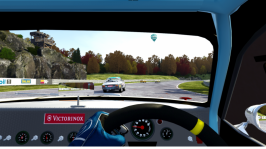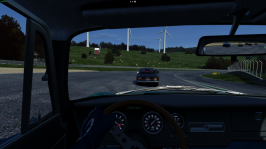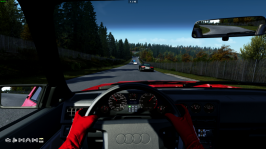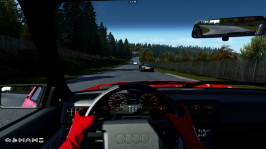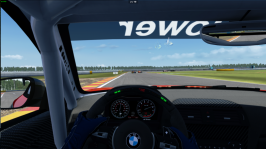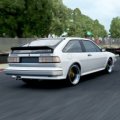

Excellent work on the skin, my friend!
Well deserving of a couple action shots, if you ask me!
View attachment 900103
View attachment 900104
As for the car itself, well, I think it functions just fine when used for it's intended purposeActually handles quite nicely on Kanniranni


Thanks for the long and detailed instructions, but I know how to install and activate the PP filter, I just wasn't sure if the corresponding presets needed activating too somewhere. I'm guessing they get applied automatically, then can be tweaked in the Sol configuration app as normal.I'm writing fairly detailed here just to be sure.
The filter comes in a zip file called "assettocorsa.rar". Unpack it. You will have a folder called assettocorsa (not to be confused with your game install folder). Below it is a system folder. Copy that folder to your actual assetto corsa game folder.
Confused yet?
Example: Let's say you unpack the assettocorsa.rar (the mod) to c:\mods\
Let's say your game install folder is c:\games\assettocorsa
Now copy c:\mods\assettocorsa\system folder to c:\games\assettocorsa
It should not ovewrite anything in your game folder's system folder.
Then start up CM. Go to Settings -> Assetto Corsa -> Video. Under Post-Processing select "RTFX 2020 ACC" in the Filter dropdown.
Then go to Drive and select one of the SOL weather types. Now start the game.
Open the Sol Config app in-game. Increase blacklevel compensation (value depends on yout monitor). On my the default (0) is way too dark. Then set colors whitebalance to 3. Again, this depends on your taste. 0 and below is blue-ish. Above 0 is warmer.
Then go to page 1 (at the bottom of the Sol Config app) and disable ppfilter load basic custom config (although I'm not quite sure if this is necessary). Then just play around with ppfilter brightness and ppfilter contrast until you are happy. I set them to 110 and 95 respectively. Overcast was a bit too dark on my monitor by default. 110 makes it look a bit more like a bright day.


Yeah sorry about the over-explanation. I sometimes do that because I like clear instructions myself, even if I'm quite proficient with a computer just like you.Thanks for the long and detailed instructions, but I know how to install and activate the PP filter, I just wasn't sure if the corresponding presets needed activating too somewhere. I'm guessing they get applied automatically, then can be tweaked in the Sol configuration app as normal.
I don't think I made myself clear in the first place. As I said, it's been a while since I'd messed with PP filters so wasn't sure if something had changed. Thanks anyway.



there's something wrong with it now...
I've heard of extreme weight reduction measures but there seems to be something off with Legion's 512S...


The A3PP filter was my favorite before this arrived.
I compared them side by side and wow, this filter wins hands down in all the weathers I usually use (clear, few clouds, scattered, broken, overcast). It's a bit too blueish (for my taste) by default, but a few clicks to the right on the colors whitebalance setting fixed that. I use 3 or 4 there now.
In addition I increased the black level compensation and brightness and slightly decreased contrast. Lighting nailed!!



Make sure in your extensions folder you have replaced the textures shaders patch usesNever ran into this with any car, not sure what the answer is. Correct tire walls (Fstones, not VRC tyre) are there for the 2018 road version.
But when going into race session, selecting (red) softs, just defaults back to VRC red wall tyres. You can see the Firestone underneath on-track
But in showroom, yeah.
Is the tire in the kn5 to default back to VRC's?

Tip: Try Silverstone and/or Red Bull Ring overcast at 12 o'clock. Looks very real.Trying to get there meanwhile.




The A3PP filter was my favorite before this arrived.
I compared them side by side and wow, the Blackcelica's filter wins hands down in all the weathers I usually use (clear, few clouds, scattered, broken, overcast). It's a bit too blueish (for my taste) by default, but a few clicks to the right on the colors whitebalance setting fixed that. I use 3 or 4 there now.
In addition I increased the black level compensation and brightness and slightly decreased contrast. Lighting nailed!!
I don't have access to my gaming rig right now, but I can give them in text.Would it be a bother if I ask for a screenshot of you contrast, blacklvl compensation etc settings? I am using this filter right now and looking for some good settings


EB110 SS/GT/NO-AO version?



EB110 SS/GT/NO-AO version?
AO's really helps making the car not look like low tier facebook mods
Can I ask why it's done as a MOD and not the usual way that PP filters are installed/used?If you want to give it a try, this is a filter I made that I'm using for quite few months now:
BLM PP Filter
It comes as a MOD so you can enable/disable it via CM (it won't overwrite anything)
View attachment 900152
Select it under SETTINGS > ASSETTO CORSA > VIDEO > Post-Processing > Filter
View attachment 900151
Set Saturation to around 85%


I don't have access to my gaming rig right now, but I can give them in text.
NOTE!!! In my post further up I forgot to mention that I'm using Benq Motion Blur (strobing), which reduces monitor brightness significantly. So these settings will probably not be good for those with regular always-on displays (most LCD monitors). The takeaway here is to just play around with these settings until it looks good on your monitor.
Sol config app page 0:
blacklevel compensation: 25. Very high, but I had to put it that high otherwise some trees etc. still looked too dark. On a normal (non-strobed) LCD I would probably start on 5 and go from there.
colors whitebalance: 3. Use 0 and below if you want a more blue-ish tone and 1 and above if you want a warmer tone. For my eyes 0 was too blue-ish.
Sol config app page 1:
ppfilter brightness: 110. On a normal (non-strobed) LCD I would probably start on default 100 and go from there.
ppfilter contrast: 95. On a normal (non-strobed) LCD I would probably start on default 100 and go from there.
In summary: There aren't really any objectively "good" settings. It all depends on your monitor and your personal taste. All settings can be adjusted on the fly so it should be easy to see immediately what looks good to you.
Also, given that my monitor uses strobing I guess there is no point in me posting screenshots to show how good my game looks with these settings. Because that screenshot will probably look like **** on a normal (non-strobed) monitor. I.e. way too bright.
to be able to easily enable/disable/delete it not having to dig through the various folders.Can I ask why it's done as a MOD and not the usual way that PP filters are installed/used?
Just curious about the reasoning, what advantages it brings etc.
I always install everything as mods, including CSP, SOL, filters, cars, tracks etc.Can I ask why it's done as a MOD and not the usual way that PP filters are installed/used?
Just curious about the reasoning, what advantages it brings etc.
I played around with those but couldn't see any difference. Will test some more, thanks!Have you altered the following?
Blackcelica has advised to activate all 4 points here but I think if these are activated, they are altered by SOL which is quite the opposite?
Thanks, I'll test the sky preset and smog.Here are the blackcelica´s recommended settings (copied from RD):
Page 0 blacklevel compensation 30 (depends on your monitor) colourwhitebalance -2
Page 1 ppfilter modify all on
Page 5 sky blue preset 10, sky smog % 150
Page 6 cloud render 1 (3D)
Also, set ingame saturation to 85% (vanilla AC settings).
N.B.: sky smog is quite tarting, don´t know if that will be everybody´s darling but I like it.
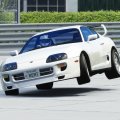


alright the v1.5 ver of the MC F1 LM
we fixed the gauges it took us so many hours just to find clear ones and crop them into the F1 LM project. The only part were its rough is in the fuel gauge part but otherwise its the same gauges as the Real F1 LM we also made a new skin for it kenneth did it for Unkowinindydriver otherwise known as Dragster666.
Edit if the gauges stay the same try the yellow skin.
View attachment 899971
View attachment 899972
some upcoming projects:
Bugatti EB110 it will include a Dauer carbon fiber version
View attachment 899973
SLS AMG Electric because why not?
View attachment 899974
And the XJ220S this one will be a tricky one to do.
View attachment 899975
I don't have access to my gaming rig right now, but I can give them in text.
NOTE!!! In my post further up I forgot to mention that I'm using Benq Motion Blur (strobing), which reduces monitor brightness significantly. So these settings will probably not be good for those with regular always-on displays (most LCD monitors). The takeaway here is to just play around with these settings until it looks good on your monitor.
Sol config app page 0:
blacklevel compensation: 25. Very high, but I had to put it that high otherwise some trees etc. still looked too dark. On a normal (non-strobed) LCD I would probably start on 5 and go from there.
colors whitebalance: 3. Use 0 and below if you want a more blue-ish tone and 1 and above if you want a warmer tone. For my eyes 0 was too blue-ish.
Sol config app page 1:
ppfilter brightness: 110. On a normal (non-strobed) LCD I would probably start on default 100 and go from there.
ppfilter contrast: 95. On a normal (non-strobed) LCD I would probably start on default 100 and go from there.
In summary: There aren't really any objectively "good" settings. It all depends on your monitor and your personal taste. All settings can be adjusted on the fly so it should be easy to see immediately what looks good to you.
Also, given that my monitor uses strobing I guess there is no point in me posting screenshots to show how good my game looks with these settings. Because that screenshot will probably look like **** on a normal (non-strobed) monitor. I.e. way too bright.


Thanks, I'll test the sky preset and smog.
Haven't used 3D clouds yet because I'm worried it will affect fps too much. And colors whitebalance -2 is way too blue on my monitor.