F1 2018 has been out for a few days now. Launching alongside the season’s return at Spa-Francorchamps, it’s the biggest and best in Codemasters’ decade-long run. Arguably at the center of that is the in-depth Career Mode.
In between picking the brain of game director Lee Mather and penning our F1 2018 review, we’ve spent a bunch of hours in the career across thousands of miles. For those unfamiliar with the experience — like the author, up until earlier this year — it can be a little intimidating. That’s why we’ve assembled this guide to help players make the most of one of the best career modes in the genre. Buckle up!
Match Your Style to the Team, Not the Other Way Around
F1 2018 introduces a sportman/showman scale, and every team has its preferences. Mercedes wants that air of buttoned-down, steely German efficiency, while you wouldn’t be a Ferrari driver without a little bit of fire in your belly. Don’t sign for a team if you know your attitude clashes; it’ll just be a needlessly uphill battle to stay in the team’s good graces.
This next bit will depend on your difficulty settings: match your expectations to the team’s too. Don’t join Williams with the goal of dethroning Hamilton, unless you’ve really cranked down the AI’s skills. The Career Mode in F1 2018 is that rarest of single-player experiences in racing games; you don’t actually have to win every race here. The team will have reasonable expectations for you on your debut season. Stretch yourself too thin and you could cause more harm than good.
Practice, Practice, Practice
Being fast on track is only one aspect of a successful career in F1 2018. You’ll need to support the engineers too, ensuring they upgrade the car throughout the season to remain competitive. The best way to do that is the practice programs available at each grand prix.
Codemasters has tweaked the setup for this year. There’s one more program, for ERS, making it a total of six:
- Track Acclimatization – Pass through gates at the correct speed over the course of a lap
- Tire Management – Learn the art of rubber conservation
- Fuel Management – The same as above, but with the gas tank instead
- ERS Management – Manage the Energy Store’s battery levels effectively
- Qualifying Pace – Pretty straight-forward, actually: send it!
- Race Strategy – Run multiple laps to determine your actual tire/fuel consumption
There’s a diminishing-returns system at play here: a passing grade on the first one will net you 50 RP; the second, 40; third, 30; and so on. This means you can skip one, too. Double each amount if you achieve a Perfect score.
If you’re utilizing all three practice periods, make sure to pick the optimal times for certain programs. Track Acclimatization and Qualifying Pace are best served with an empty (and dry) track, so use them as early as you can.
In addition to these, you’ll find five small goals worth 5 RP each. These usually involve things like optimal sector times in the Qualifying Pace program, or trying two different setups in one practice session. If you’ve recently upgraded the car in any way, the R&D team may want you to test the new part. Hit the target, and you’ll have an additional 10 RP.
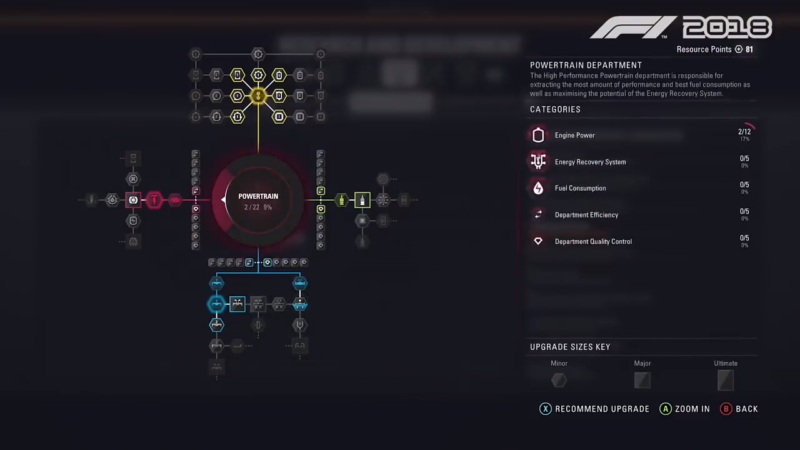
Spend RP Now, Save RP Later
As tempting as it is, don’t rush off to start upgrading as soon as you’ve got a healthy store of Resource Points. Aim for the efficiency perks first, the ones that reduce upgrade costs and lower the chances of R&D failing. These aren’t cheap: it will cost you 7000 RP per department to reduce all upgrade costs by 50%. In the long run, it’s worth it.
The quality control perks are less clear-cut. A guide on Reddit for F1 2017 by user NevCee suggests two upgrades per department. We followed that in our first season and only had one failed part. There’s a way to further buff your success rate though — and reduce costs.

Let The Media Work For You
Codemasters made a lot of noise about the return of the media interview in F1 2018. The good news is that it’s a simple enough little mini-game, with most answers making it obvious what the results will be.
Use this to your advantage. When you know you will be spending money on upgrades, rep the specific R&D department any chance you get. If you’re a McLaren driver looking to improve your engine, talk it up at every opportunity. With positive morale, a department can see improvements of up to 20% in costs and quality control. But which to pick?
Focus On Eliminating Weaknesses, Not Amplifying Strengths
Joining up with McLaren, we found the chassis was actually quite a good one. That made it all the easier to shovel money into the engine department, and to a lesser extent later in the season, the aero team.
So long as you’re completing all the practice programs, this strategy will work. Not upgrading department A will of course start putting it behind other teams, but the move up the ranks will happen faster in department B than the slow slide down will in A.
The exception to this is the Reliability department. Keep an eye on your part wear over the first couple races. For most items, you only get two or three units per 21-race season. If the wear rate for any equipment suggests replacements before mid-season (two parts/season) or seven races (three/season), focus on improving that specific part’s reliability on the R&D tree.
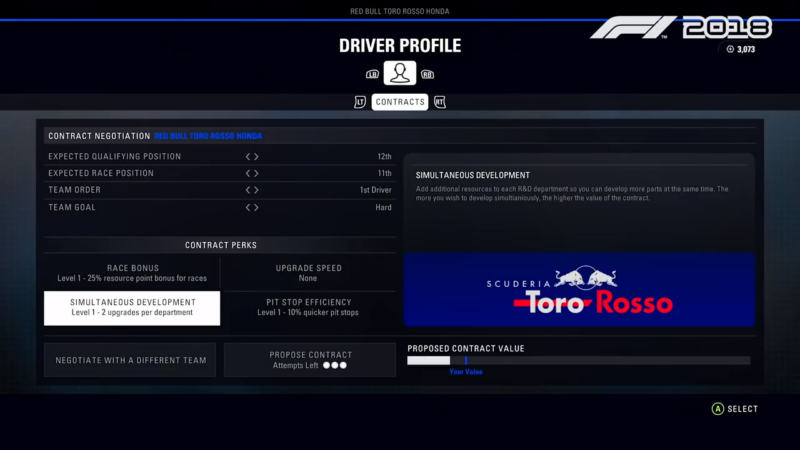
Drive a Hard Bargain Come Contract Time
The new contract negotiation feature is a great source of additional RP. There are a few perks you can push for each time a new contract comes up, each with three tiers:
- Race Bonus – Earn extra RP after each race
- Upgrade Speed – Shorten the development time for upgrades
- Simultaneous Development – Increase the number of upgrades a department can work on at once
- Pit Stop Efficiency – Shorten those stops
Early in your career, focus on the bonus first, with the upgrade speed second. Simultaneous development is useful when you’ve got all of the efficiency perks dealt with, but not before.
You get three chances for the team to accept your contract before negotiations fold and you’re stuck with the initial offer. Shifting the expected qualifying and race position higher up the grid lowers your proposed value, giving you more wiggle room with the perks. Same with the harder Team Goals. Be careful not to over-promise however, as your reputation with the team will suffer.
When negotiations start, propose the highest qualifying/race position you’re comfortable with, and load up the best possible level of one perk you’ve got your eye on. Try one other one too, maybe at Tier 2. Now propose the new contract.
Chances are the team will deny this first offer, but you’ll get a sense of where the limit is thanks to the bar on the bottom right of the screen. If you’re fairly close to the marker for Your Value, drop a secondary or tertiary perk down a Tier. Only drop the primary perk’s level if there’s no other options. As your standing with the team improves, you’ll be able to take on more perks at once.
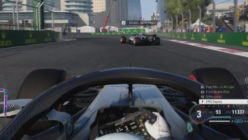
Listen to Jeff
Despite a trophy for telling him to shut up, don’t ignore Jeff. The man in the pits is also the guy in your ear during races, and he’s got a lot more info than you do.
Jeff will let you know if any parts of the car are approaching terminal status. He’ll also inform you of any weather changes, including how much time you have left before the heavens open. Use him to your advantage.
Have any of your own F1 2018 tips? Let ’em fly in the comments section!
See more articles on Tips and Tricks.